Our new Appfire Documentation Space is now live!
Take a look here! If you have any questions please email support@appfire.com
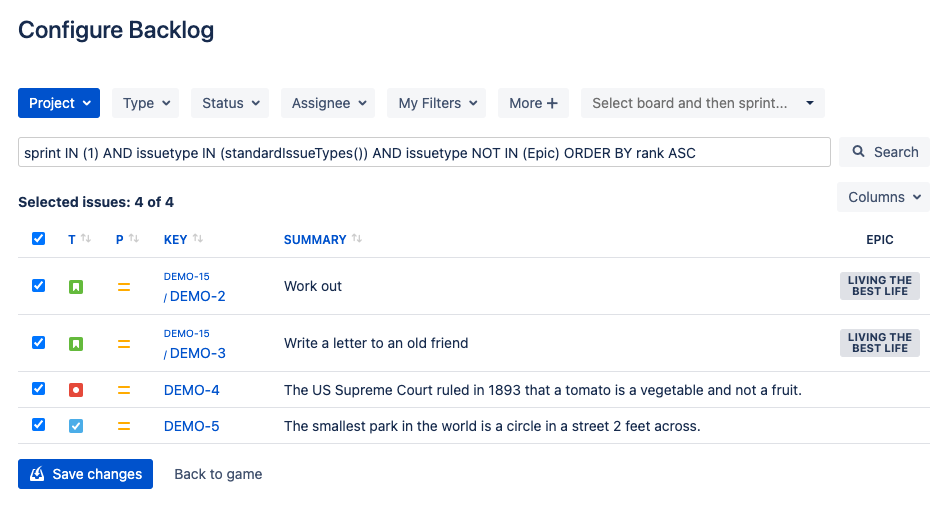
Edit backlog
- Vadym Dorozhenko (Unlicensed)
- Oleksii Kovalenko (Unlicensed)
- Vitalii Zurian (Inactive) (Deactivated)
This chapter of the Reference Guide describes the process of editing the game's backlog and all the tools involved in it.
Editing the backlog is an exclusive capability of participants with the game's admin role.
Editing the backlog is not the part of the actual game's round, but is the essential step of a game configuration, allowing the game administrator to search and add issues to be estimated during the game.
All the edit backlog features are provided to the game admin by a separate Backlog configuration. This menu is accessed once:
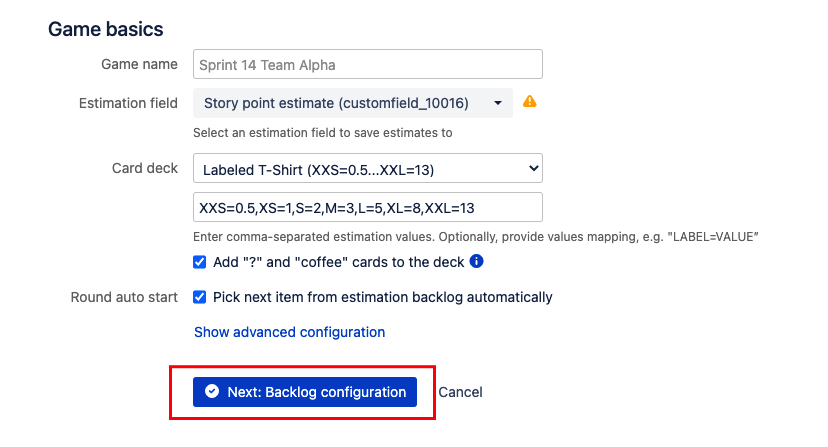
- you've configured all your new game settings and clicked "Next: Backlog configuration" in the Game Configuration Menu;
- you've clicked Edit Backlog button in the existing game's Top bar menu.

Edit backlog menu's main goal is to allow the game's admin to search for issues in Jira projects, add them to the game's backlog, and order them within the game's backlog. Edit backlog menu's tools are scrutinized below.
Search & Filters
Before you start ordering issues in your game's backlog, issues should first be queried for and added into the game. Here is where the filters bar and JQL-query search input come to hand.
Let's take a closer look at the controls, allowing you to search and add issues to your backlog. There are three of them on the top of Edit Backlog menu:
- The filters bar used to select desired filters and to add them to the current JQL-query;
- Input, containing actual JQL-query, that is used to search issues in your Jira;
- A search button that executes the JQL-query on click.
The filters bar and JQL-query input are the controls to be discussed more thoroughly.
By default, you will be able to use the following filters in the filters bar:
- Project;
- Type;
- Status;
- Assignee;
- My Filters;
- Board + Sprint.
You can use the Fields dropdown to quickly add even more filters to your filters bar. To do so just click the "More +" dropdown in the filters bar, pick the desired filter from the list and select it. Once the filter is selected in the dropdown, it will be added to your filters bar and you will be able to use it along with default filters. You can add numerous filters via the "More +" dropdown.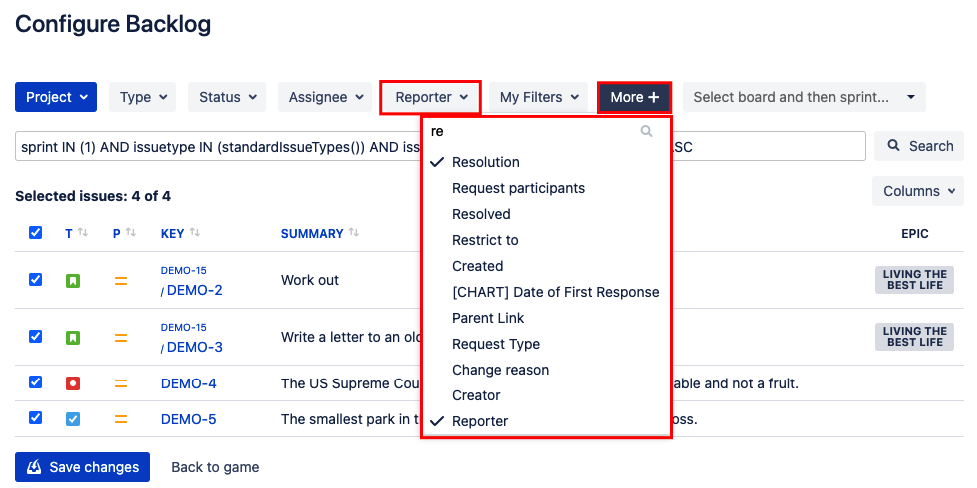
You can also use your custom filters with the help of "My Filters" dropdown in the filters bar. To get more information about custom filters, check out Jira tutorials.
When you are selecting a filter, its effect is applied immediately, while all the other filter values are neglected.
Now, let's combine this knowledge with the information about JQL-query input. For example, if you select a certain project in "Project" filter dropdown, "Story" and "Sub-task" in "Type" filter, these criteria will be added to JQL-query in your input in the following way: project IN ("Your Project Name") AND type IN (Story, Sub-task).
As you can see, all the selected filters are joined into one JQL query. Therefore, you may think of the filters bar as the visual interface to edit JQL-query, which will be used to find issues in your Jira.
Joining multiple filters and deselecting filters
As it was mentioned above, it's possible to apply multiple filters. You should be aware that when you're adding another filter to the filter you've already selected, the last remains selected. Instead of deselecting your previous filter, a newly selected filter is joined to it, thus making your query longer and more specific.
If you want to exclude a filter from the query, you should do so by deselecting it in the filters bar dropdown or by editing JQL-query itself in the input.
Once you deselect a filter in the filters bar, your JQL-query input is updated and such a filter is excluded from it.
While the filters bar stands for the convenience of editing JQL-query, it's the last one that runs the search. If you're a seasoned Jira user, you can lay down your own JQL query into input and press "Search" to find issues you're willing to add to your Planning Poker game. Building custom JQL-query is an extremely flexible approach to commence search in your Jira projects, but to master it you have to know how to deal with operators, expressions, and other features of Jira Query Language (JQL). Feel free to surf Jira tutorials to learn more about how to use JQL.
Re-importing backlog for JQL in the backlog phase
The JQL query you're using to add issues to the game is saved as one of the game parameters. If later on in the game some of the issues were deleted or added, the game admin can quickly restore the backlog right during the backlog phase by using "Re-importing backlog for current JQL" feature: issues in the JQL-query will be added to the game if absent; issues out of the JQL-query will be removed from the game if present.
Drag & drop
Now when we have all our desired issues found and added to the Planning Poker game, it's time to order them as we want.
There is one good old-fashioned way to do it manually: just click and hold an issue you want to move, drag it to the place you want it in the list and drop it. That's it.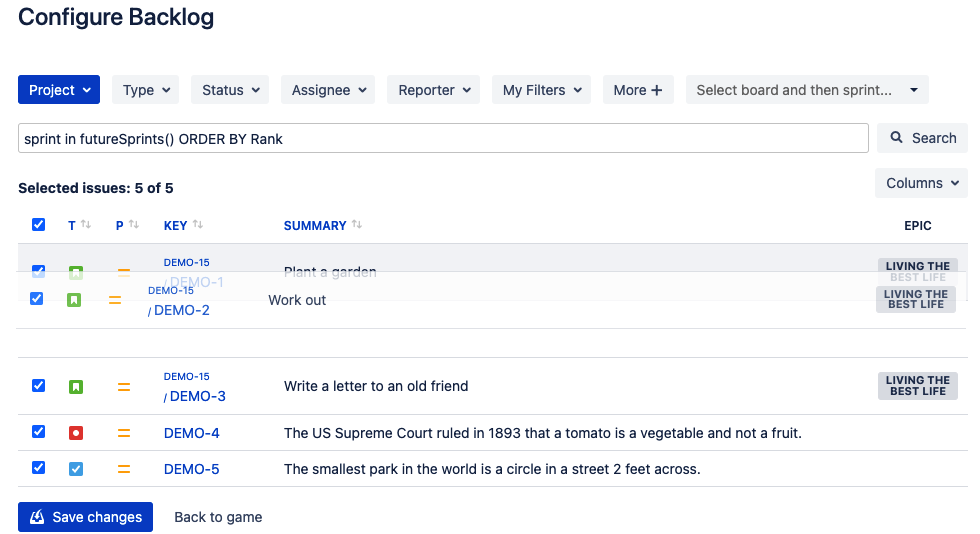
Order matters
The issues order is valuable not only for your game's inner consistency and semantics. When the issue to be estimated in the next game's round is picked automatically (round autostart is enabled), it is picked from the top of the backlog list.
Keep this in mind while editing your backlog.
Ordering by columns
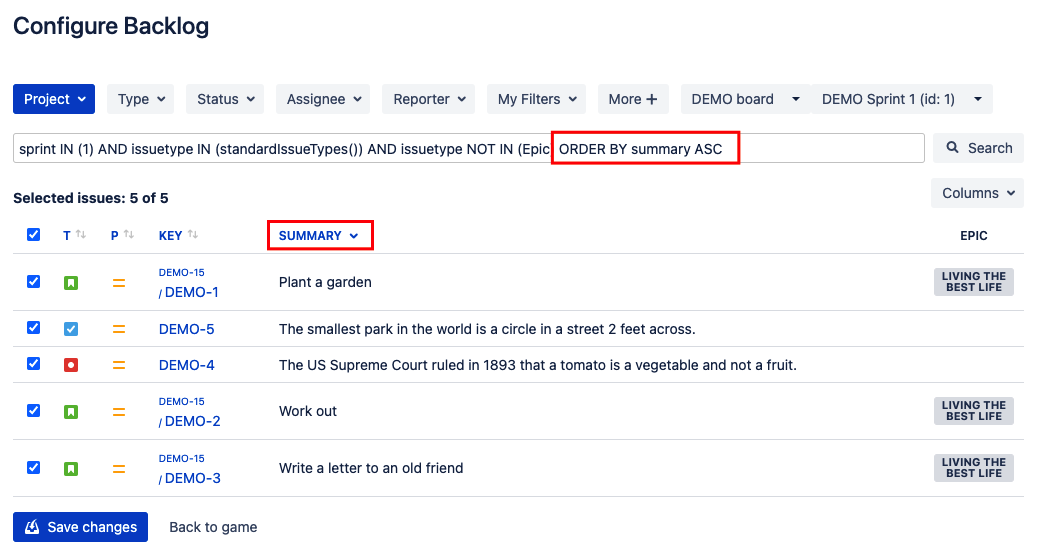
There is a more sophisticated way to order issues while editing a backlog than drag and drop: you are also able to order issues by columns, ascending or descending.
To do so, just pick a header of a column you wish your issues to be ordered by and click it. Once clicked your issues will be ordered by a chosen column, ascending. If the same column is clicked once more, the order will be switched to descending, and so on.
Ordering by columns affects your JQL query, becoming part of it once applied.
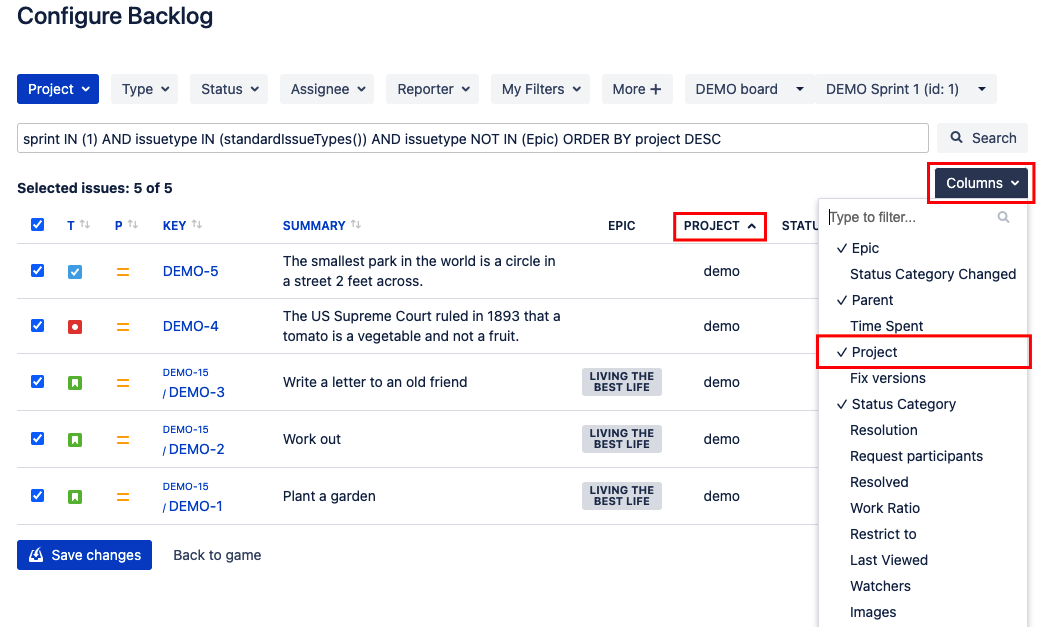
Adding extra columns
If you feel like you need some other columns to order your backlog by, you can easily add them. Click on a columns dropdown and select the column it in the list.
The Epic column is added by default.
You can select multiple columns. Once a column is selected it will be immediately added to the backlog list.
Ordering by extra columns works just the same way as it works with regular columns.
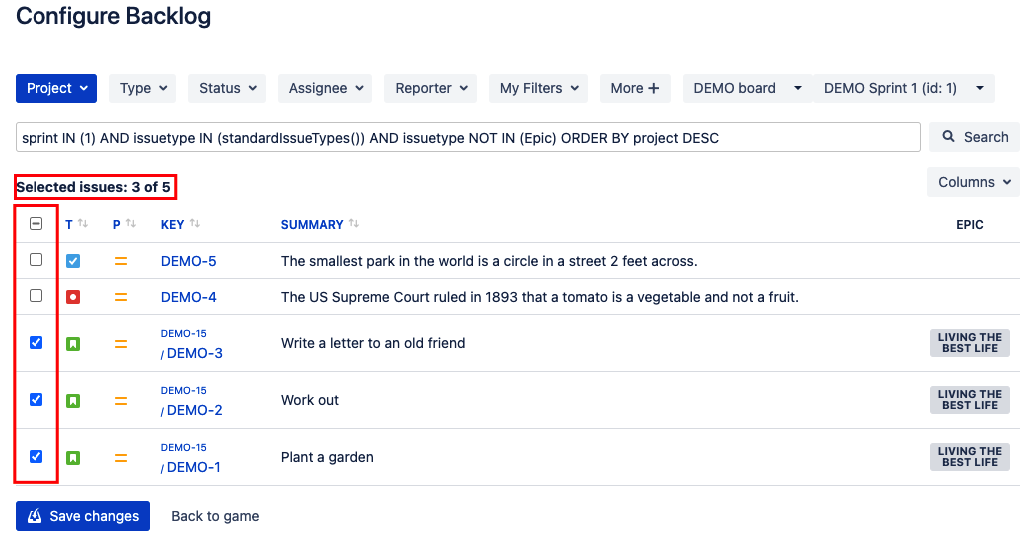
Specifying issues to be added to the game
If your JQL-query was not precise enough to select specifically the issues you've planned, you are always free to define specific issues for the game. Use the checkbox column from the left-hand side of the backlog.
Checked issues will be added to the game. Unchecked will be ignored:
This chapter, along with "Game start and configuration" and "Game details", has described all the Planning Poker game's features and aspects.
The last chapter of this Guide will contain additional information about global Planning Poker app settings, mobile applications, and some reference information about user roles.